
Wednesday, February 13, 2013
Kale chips

Monday, February 11, 2013
Lemon peel

Saturday, February 9, 2013
No Cheating February
So the holidays happened, and I got a bit off track in my eating. I feel so much better when I eat a no dairy, low sugar diet. It's just hard to get back to that after letting my will-power get flabby over the holidays. No cheating February seems like a good place to start to strengthen my ability to "just say no" to foods that make me feel like crap (even though they taste oh-so-good).
Here's something I've been reflecting on: why do I put things in my body that I know make me feel yucky? I've come up with some answers, but I'm curious to know if any of you (if there are any readers still out there) have had similar struggles.
Tuesday, February 5, 2013
Hello again, cyber world. As I was swimming laps this morning my mind started to wander, and I began to think that this blog might be the right space to share my exercise journey in order to keep my self accountable.
I had another realization--one of the things that has been holding me back and stressing me out has been wondering if I am pregnant. I know, it sounds weird, but we've been trying to conceive since September, and so far it's a no go. This would be my fourth child, so I'm really okay if our family ends up consisting of the three amazing and rambunctious children we already have. The anxiety comes from not knowing. From not being able to plan out my next race because of the possibility I might be pregnant.
Anyway, while swimming I decided to less this anxiety go. If I end up forfeiting a race fee, oh well. It's a small price for peace of mind. I'll be thrilled if another child is in the cards for our family, but I'm going to keep setting fitness goals in the mean-time.
So here they are: swimming--swim 25 laps in 30 min. Today I swam 24 laps in 30 minutes, but I used my zoomers for 16 laps, so I'm not as close to my goal as it seems.
running--run a 10k in April in less than an hour
biking--stretch my IT band so it doesn't kill my hip every time I ride.
yoga--do a sun salutation every day and an hour long session weekly.
strength--15 real push-ups (don't mock my wimpiness)
What are YOUR goals?
I had another realization--one of the things that has been holding me back and stressing me out has been wondering if I am pregnant. I know, it sounds weird, but we've been trying to conceive since September, and so far it's a no go. This would be my fourth child, so I'm really okay if our family ends up consisting of the three amazing and rambunctious children we already have. The anxiety comes from not knowing. From not being able to plan out my next race because of the possibility I might be pregnant.
Anyway, while swimming I decided to less this anxiety go. If I end up forfeiting a race fee, oh well. It's a small price for peace of mind. I'll be thrilled if another child is in the cards for our family, but I'm going to keep setting fitness goals in the mean-time.
So here they are: swimming--swim 25 laps in 30 min. Today I swam 24 laps in 30 minutes, but I used my zoomers for 16 laps, so I'm not as close to my goal as it seems.
running--run a 10k in April in less than an hour
biking--stretch my IT band so it doesn't kill my hip every time I ride.
yoga--do a sun salutation every day and an hour long session weekly.
strength--15 real push-ups (don't mock my wimpiness)
What are YOUR goals?
Sunday, January 23, 2011
Confessions and Revival
So I need to get back on track with my eating. A couple of things derailed me. 1. I found out I was pregnant. 2. My husband was furloughed in August, so our income took a hit. I started buying the cheap stuff to save money and found myself back to eating refined sugars and flours.
Now that baby is here, I'm back to eating egg/dairy free. So I figured now is a good time to get back to better eating habits.
Here are some questions I have: 1. Is anyone else still interested in this blog? 2. Would you (contributors) mind if we had a schedule for posting things (I'm thinking that if each of us posted once/month we would get a lot of great recipes, etc.)? What are your thoughts?
Now that baby is here, I'm back to eating egg/dairy free. So I figured now is a good time to get back to better eating habits.
Here are some questions I have: 1. Is anyone else still interested in this blog? 2. Would you (contributors) mind if we had a schedule for posting things (I'm thinking that if each of us posted once/month we would get a lot of great recipes, etc.)? What are your thoughts?
Tuesday, May 18, 2010
Edamame Pate
Edamame Pate'(courtesy of Vegetarian Times*)
1 1/4 cups frozen shelled edamame, thawed (You can buy frozen, shelled edamame at any grocery store).
1/2 cup walnuts
1/3 cup mint leaves (packed)
1 green onion, chopped
1/4 tsp salt
3 Tbs. lemon juice
3 Tbs. water
Puree the first 5 ingredients in a food processor until finely chopped.
Add lemon juice and water then process until smooth.
I used pecans instead of walnuts, because I had them on hand and it was still so tasty. This makes a great dip for veggies or pita chips. Very light and refreshing. You can also spread on a whole wheat tortilla and stuff with fresh vegetable goodness.
1 1/4 cups frozen shelled edamame, thawed (You can buy frozen, shelled edamame at any grocery store).
1/2 cup walnuts
1/3 cup mint leaves (packed)
1 green onion, chopped
1/4 tsp salt
3 Tbs. lemon juice
3 Tbs. water
Puree the first 5 ingredients in a food processor until finely chopped.
Add lemon juice and water then process until smooth.
I used pecans instead of walnuts, because I had them on hand and it was still so tasty. This makes a great dip for veggies or pita chips. Very light and refreshing. You can also spread on a whole wheat tortilla and stuff with fresh vegetable goodness.
Wednesday, May 5, 2010
Easy facial

I first saw this idea here. I blended up some oats when I made soap recently, had leftovers and decided to use them this way.
Step one: blend 1 C oats in a food processor or blender. Store in a glass jar or tuperware -like container.
Step two: Cover a small towel in hot water, wring out, then place on your face to open the pores.
Step three: Put a small amount of the ground oats in a small bowl. Add just enough plain yogurt to make a paste, then spread on your face.
Step four: Wait. 10 minutes should do it. Not longer than 15, or you can damage the skin.
Step five: wash off with warm water over the sink.
Step six: apply a toner. Mine is just a few drops of lavender essential oil in water.
Step seven: apply moisturizer. Mine is aloe vera gel (100%) mixed with a tiny bit of glycerine (which can be left out all together if your skin feels too sticky)
Ahhhhhh. It's very relaxing, yet not very time consuming, and my skin looks and feels great afterwards.
Monday, May 3, 2010
Homemade Laundry Detergent
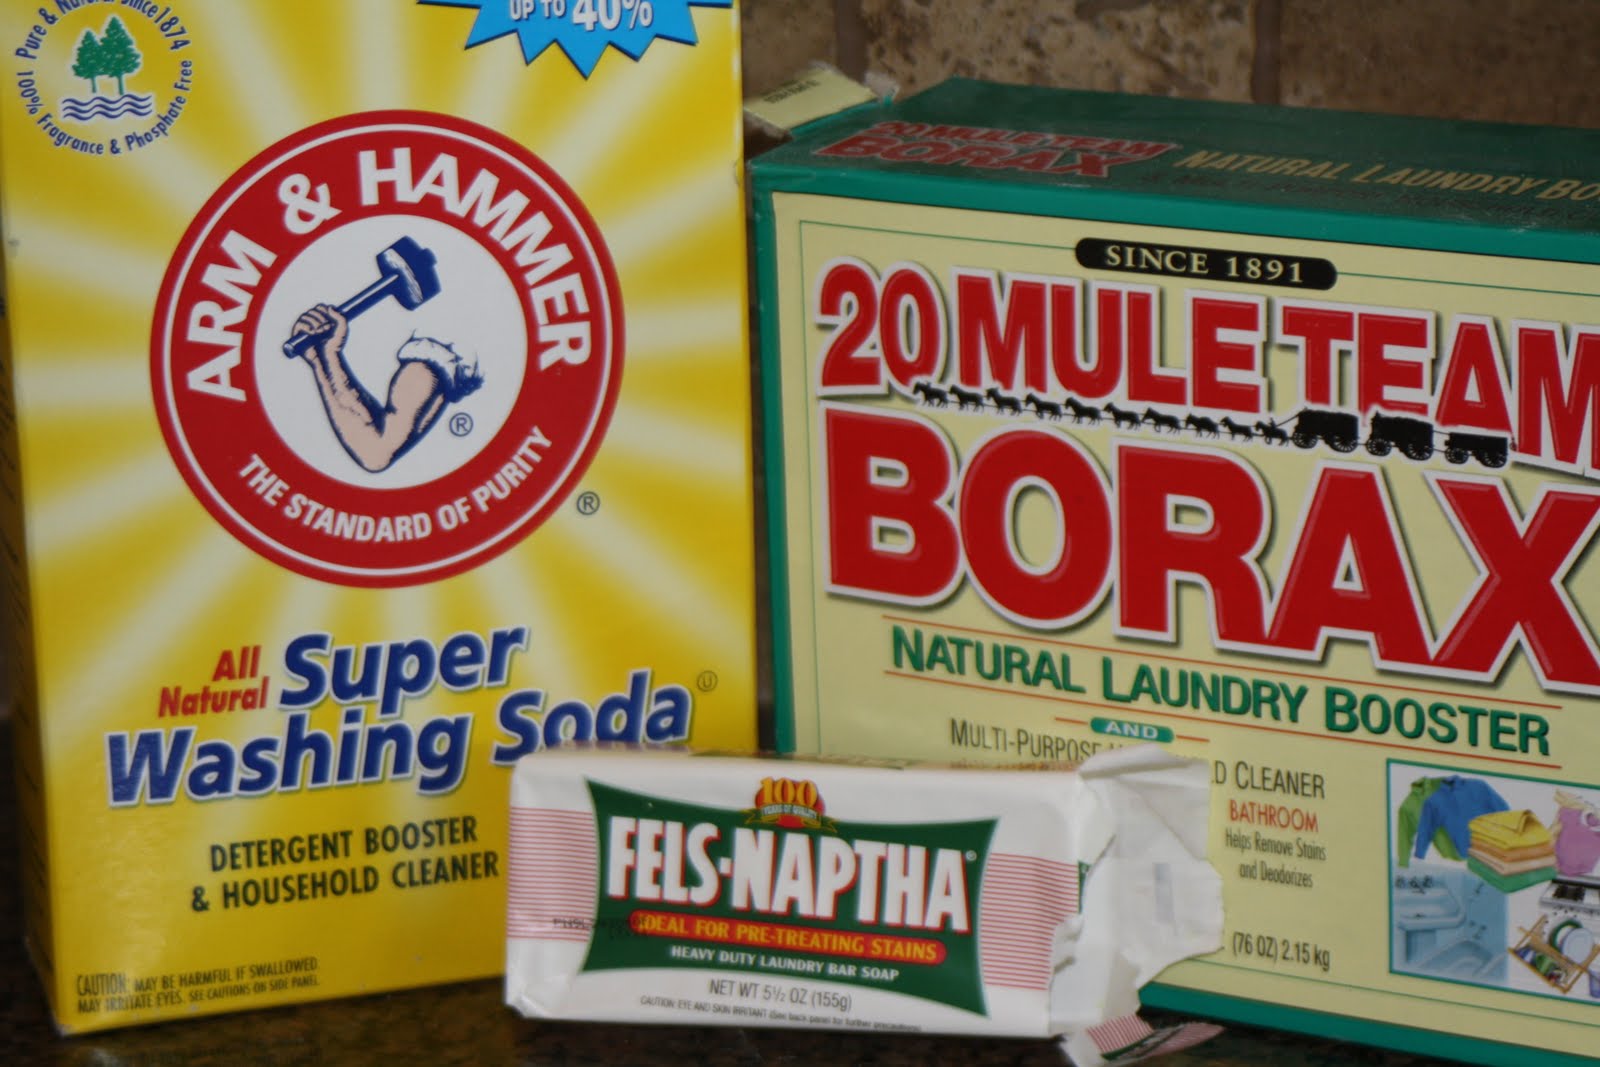
I got this recipe from my neighbor. I'm not sure how toxic Fels-naptha laundry soap is, so I don't know it this counts as less-toxic. It is cheap, and made with stuff I generally have on hand these days. And it satisfies the part of me that loves doing things myself.
Here's the recipe:
Put four cups very hot tap-water into a large saucepan. Grate 1 bar fels-naptha soap into the water and heat on medium heat until the soap is fully dissolved.
Fill a 5-gal bucket approx. 1/2 full with very hot tap-water. Add 1/2 C borax and 1 C washing soda. Stir to mix.
Pour melted soap mixture into the bucket, stir until combined. Fill the bucket almost to the top with more very hot tap-water. Stir again, cover with a lid, and let sit overnight.
Fill a container (like an old liquid laundry soap container, or a water container with a spigot) 1/2 full with water. Fill the rest of the way with the detergent concentrate from the bucket.
For top loaders, use 5/8 C per load (I use 1/2 C for simplicity. Close enough, right?)
For front loaders, use 1/4 C per load. I imagine that less should be used with soft water, no matter the type of machine you have.
Saturday, May 1, 2010
Homemade Vanilla Extract
 Shelly had the idea to try to make vanilla extract, and since she found a great deal on a big shipment of vanilla beans, she invited me to try it out with her. I used a blend of Tahitian and Madagascar vanilla beans. We bought the cheapest vodka we could find at the liquor store, and it worked just fine. I used this recipe, Shelly tried a different variation.
The results: smell test--this extract smells better than the store bought real vanilla extract (more like vanilla, less like alcohol). It contains about the same quantity of alcohol (35%), but it smells much better.
Taste test--I made cookies using homemade vanilla extract and they tasted great. I should probably try out something where the vanilla has a more prominent flavor, but haven't had the need yet.
Friday, April 23, 2010
Homemade Lotion
First, a warning. Homemade lotion has a much different feel than store bought stuff. When I first started making my own lotion, I was not 100% impressed, but I wanted to give it a good shot before I gave up completely. It seemed really greasy... I discovered is that I need a lot less lotion compared with commercial products. A small dab of homemade stuff is about equivalent to a full pump of commercial stuff. And when I started using less, it was magically less greasy. Anyway, now I am thoroughly addicted to homemade lotion. It just feels so much more natural. It is very softening, and you can customize it to fit your skin type. While Aaron was in the hospital, I ran out of my homemade lotion, and didn't have time to whip up a batch (not that it takes long). I still had a bottle of Curel around, so I just used that for a few days until I had time to make some lotion. I don't think I'll ever run out of homemade lotion again, because I HATED using the Curel. Please keep in mind that I have been using Curel lotion for like 15 years. I loved the stuff before I tried something better. Homemade is better. So you should try it. One batch lasts me about a month, but for other people it may last longer (I'm a bit of a lotion-aholic).
This recipe is a hybrid of a couple of recipes in Better Basics for the Home.
Basic Lotion
2 1/2 ounces almond oil
1 1/2 ounces coconut oil *
1/3 beeswax, grated (if you want really thick lotion, add a little more)
2 ounces aloe vera
2 ounces water
1 Tbsp glycerin
1/3 tsp grapefruit seed extract (GSE)
10 to 25 drops essential oil, if desired (I don't personally desire)
*I like to use deodorized coconut oil for lotion, but only because I love the light beeswax smell. Regular coconut oil covers the beeswax smell up. If you like the coconut scent, or if you are planning to add essential oils for fragrance, it probably won't matter either way.
Melt the oils and beeswax. I don't have a double boiler, so I usually just put my glass measuring cup in a pan of water on the stove. Or I use the microwave. If you use the microwave, do it in 20 second intervals and stir in between. It doesn't take very long.
In another bowl, combine the water, aloe, glycerine, GSE, and essential oils, if using. At this point, I like to let the oils cool a bit before combining. I just find the lotion emulsifies better if the oils aren't piping hot. You can't cool it completely though, or it will solidify. Then you just beat them together with an electric mixer until the mixture is nice and creamy. I doesn't take long, but do make sure it is fully emulsified before you stop beating. If you stop prematurely, your lotion will sweat (i.e. the waters and oils don't stay combined in the jar, and the lotion sort of oozes the waters out). I use jars that hold 1/2 cup, and this recipe fills two jars. Then I do the lotion equivalent of licking out the bowl, which is slathering the leftovers all over my legs. Isn't that a lovely visual in your mind. I bet you wish you had a picture of that...
It took me a couple of tries before I was proficient at this. But don't let me scare you, this is nothing like making cheese, or soap. My first batch or two really sweat a lot. Don't worry if that happens, you can still use it and it is just as effective. It just isn't the perfect consistency. No worries.
In case you are wondering, the GSE is a preservative. You can store this at room temperature. This lotion should have a shelf life of at least four months, but like I say, I go through one batch in about a month. If you think you won't use it that quickly, you can store in the refrigerator to prolong the life.
There are a million variations you can make to customize this, but I think this is a great place to start. I've tried a few different oils, and I really prefer the almond oil for lotion.
Make sure you don't judge homemade lotions prematurely. Get used to it for a while, then I dare you to switch back to store bought stuff. You will hate it!
p.s. What does "manually gifted" mean?
This recipe is a hybrid of a couple of recipes in Better Basics for the Home.
Basic Lotion
2 1/2 ounces almond oil
1 1/2 ounces coconut oil *
1/3 beeswax, grated (if you want really thick lotion, add a little more)
2 ounces aloe vera
2 ounces water
1 Tbsp glycerin
1/3 tsp grapefruit seed extract (GSE)
10 to 25 drops essential oil, if desired (I don't personally desire)
*I like to use deodorized coconut oil for lotion, but only because I love the light beeswax smell. Regular coconut oil covers the beeswax smell up. If you like the coconut scent, or if you are planning to add essential oils for fragrance, it probably won't matter either way.
Melt the oils and beeswax. I don't have a double boiler, so I usually just put my glass measuring cup in a pan of water on the stove. Or I use the microwave. If you use the microwave, do it in 20 second intervals and stir in between. It doesn't take very long.
In another bowl, combine the water, aloe, glycerine, GSE, and essential oils, if using. At this point, I like to let the oils cool a bit before combining. I just find the lotion emulsifies better if the oils aren't piping hot. You can't cool it completely though, or it will solidify. Then you just beat them together with an electric mixer until the mixture is nice and creamy. I doesn't take long, but do make sure it is fully emulsified before you stop beating. If you stop prematurely, your lotion will sweat (i.e. the waters and oils don't stay combined in the jar, and the lotion sort of oozes the waters out). I use jars that hold 1/2 cup, and this recipe fills two jars. Then I do the lotion equivalent of licking out the bowl, which is slathering the leftovers all over my legs. Isn't that a lovely visual in your mind. I bet you wish you had a picture of that...
It took me a couple of tries before I was proficient at this. But don't let me scare you, this is nothing like making cheese, or soap. My first batch or two really sweat a lot. Don't worry if that happens, you can still use it and it is just as effective. It just isn't the perfect consistency. No worries.
In case you are wondering, the GSE is a preservative. You can store this at room temperature. This lotion should have a shelf life of at least four months, but like I say, I go through one batch in about a month. If you think you won't use it that quickly, you can store in the refrigerator to prolong the life.
There are a million variations you can make to customize this, but I think this is a great place to start. I've tried a few different oils, and I really prefer the almond oil for lotion.
Make sure you don't judge homemade lotions prematurely. Get used to it for a while, then I dare you to switch back to store bought stuff. You will hate it!
p.s. What does "manually gifted" mean?
Thursday, April 22, 2010
I'm sold!
I used my Moon Cup this past cycle and am a convert, complete with desires to share the find with the world. I was really easy to use, and very comfortable. I actually noticed it less than a tampon (I did have to trim the stem a little). And, best of all, it worked great! I also loved that it didn't dry me out or bug my skin.
I highly recommend it. It's especially easy if you've ever used applicator-free tampons before.
Okay, I'm done.
I highly recommend it. It's especially easy if you've ever used applicator-free tampons before.
Okay, I'm done.
Tuesday, April 13, 2010
Love of the loving love
It's cool, it's refreshing, it's purple...I give you the Island smothie.

This is another Runner's World recipe from the March 2010 RW. You know, the one with Kara Goucher on the front...she's the one who took 3rd in the Boston Marathon last year, but only lost by mere 20 seconds to that Kenyan woman...of course you do. She may be a little something of a hero of mine. Just saying.
You will need...

1 cup low-fat peach kefir (not pictured. I used yogurt. Both ingredients work well)
1/4 cup low-fat milk (or soy)
1/2 cup canned crushed pineapple
2 TBS dried coconut
about 1/4-1/2 cup instand oatmeal
3/4 cup frozed raspbarries (I used mixed berries because I had them)
Really you just toss all this together, and I realize I don't need to take pictures of this process because we all no how to combine and blend, but I like to take pictures so you're stuck with me.

Channelling some Pioneer Woman here...

Doesn't that look just lovely? Did you ever think to put oatmeal in your smoothie? I hadn't. You won't even know it's there. And neither will your kids.

OK, here is everything all together (pay no attention to the water spots on my blender.)

But then I thought of one last thing in my fridge that I thought would be nice. Ground Flax. Flax is perfect for smoothies because it generally needs to be ground up to release the omega3 and other nutritional benefits, and your blender does that quite well, so throw some in. This is already ground, but it can't hurt to grind that baby up some more.

Blend away. And if you want to channel your inner Kara Goucher while doing so, well, that's just find by me.
Several studies have linked kefir, a yogutlike drink, with reduced reaction to allergens. And a 2008 Australian study reported that long-distance runners who take a strain of the probiotic lactobacillus (often found in Kefir) every day sufer less severe bouts of respiratory illness. Oats can help cut your risk of heart disease and type II diabetes, while raspberries are rich in the antioxidant quercetin. A small recent study published in the International Journal of Sport Nutrition and xercise Metabolism, concluded that daily quercetin suppliments may help increase exercise endurance.And I'm willing to bet it helps us weekend warriors a tap little extra energy as well. Enjoy!
Next up...A Pasta Pumpking Surprize...and the surprize is that my husband ATE IT!
Monday, April 12, 2010
Trees and Flowers Casserole
This is a variation on a family favorite. Growing up, chicken-broccoli casserole was my favorite dish. As a teenager, I started having my mom leave me a chicken-free section. Today I had cauliflower and broccoli that needed to be used A.S.A.P., so I came up with this creation. The kids asked for second helpings.
Granted, this isn't the healthiest recipe, but it is definitely healthier than the original, and for me still hits the spot.
Ingredients
1 head of broccoli, chopped
1/2 head of cauliflower, chopped
2 cans cream of mushroom soup
1/2 C mayonnaise
2 T lemon juice
1 tsp curry powder
1/2 C milk
2 or 3 T butter
1/2 C bread crumbs
Shredded cheese
Directions
Bring 5 cups of water to a rolling boil in a large saucepan. Add broccoli and cauliflower and cover. Boil for about 4 minutes. Combine soup through curry powder in a medium bowl, then thin with the milk. Melt butter in a separate bowl, then add bread crumbs and stir until combined.
Line the bottom of a 9x13 casserole dish with the vegetables. Pour the soup mixture over the top. Sprinkle with cheese, then cover with bread crumbs.
Bake at 350 for 30 minutes. Serve over rice.
Granted, this isn't the healthiest recipe, but it is definitely healthier than the original, and for me still hits the spot.
Ingredients
1 head of broccoli, chopped
1/2 head of cauliflower, chopped
2 cans cream of mushroom soup
1/2 C mayonnaise
2 T lemon juice
1 tsp curry powder
1/2 C milk
2 or 3 T butter
1/2 C bread crumbs
Shredded cheese
Directions
Bring 5 cups of water to a rolling boil in a large saucepan. Add broccoli and cauliflower and cover. Boil for about 4 minutes. Combine soup through curry powder in a medium bowl, then thin with the milk. Melt butter in a separate bowl, then add bread crumbs and stir until combined.
Line the bottom of a 9x13 casserole dish with the vegetables. Pour the soup mixture over the top. Sprinkle with cheese, then cover with bread crumbs.
Bake at 350 for 30 minutes. Serve over rice.
Saturday, April 10, 2010
Strawberry Shortcake

Here's another adaptation with no white sugar. This one comes from the Better Homes and Gardens cookbook.
Ingredients
6 C sliced strawberries
1/4 C (or less) agave
1/4 C Sucanat, or other raw cane sugar
2 C all purpose flour (would be fun to try 1 C whole wheat pastry flour and 1 C all purpose flour)
2 tsp baking powder
1/2 t salt
1/4 C unsweetened apple sauce
1/4 C butter
1 beaten egg
2/3 C milk
1 C whipping cream, whipped (if desired. I used vanilla yogurt instead, and it was delicious!)
Directions
Mix the berries and agave and set aside. Combine the raw sugar, flour, baking powder and salt. Stir in applesauce and cut in butter. It should look like course crumbs when ready. Combine the egg and the milk, then add to the crumb mixture until just moistened. Pour into a greased 8 in round pan and bake at 450 for 15-18 minutes. Let cool 10 minutes before serving with strawberries and cream or yogurt.
Friday, April 9, 2010
Apple Muffins

I no longer have white sugar in my house (well, I technically have some in my emergency food storage, but I'm not planning on using it unless I have to). I've been enjoying coming up with substitutions. This recipe is adapted from a cookbook called Special Foods for Special Kids, by Todd Adelman and Jodi Behrend. I bought this book when I found out my oldest child (10 months old at the time) was highly allergic to egg and dairy. All the standard toddler foods I saw my friends giving their children were not an option for her. I had no idea what to feed her, so I turned to books. I like this particular book because each recipe is given without any adaptations first, then has a guide at the bottom for which substitutions to make for specific allergies. A lot of other resources I found were assuming that the child was allergic to most common allergens, so they contained a lot of weird and expensive ingredients.
Anyway, the point of all that rambling is that I used the original recipe, without any allergy adaptations, but replacing the flour with whole-wheat pastry flour and the sugar with honey. I'll list the egg and dairy substitutions in parentheses for those who are interested.
Ingredients
1 C peeled and diced apples
1/2 T lemon juice
1/4 C honey (could use agave or other sweetener to make this vegan)
2 T brown sugar
1/2 C unsweetened applesauce
1/4 C melted margarine (choose dairy free brand)
3 egg whites (use 1/4 C water mixed with 3 tsp. powdered egg replacer, like Ener-G brand)
1 1/2 C whole-wheat pastry flour
2 1/2 t baking powder
1/2 t salt
3/4 t cinnamon
Directions
Toss the diced apples with lemon juice and set aside. Mix honey, brown sugar, and applesauce together. Mix egg and melted butter together, then add to the sugar/applesauce mixture. In a separate bowl, combine the flour, baking powder, salt and cinnamon. Add the dry ingredients to the wet and mix to form batter. Add the apples, then put in muffin tins, approx. 2/3 full(lined with cupcake liners, if you wish). Bake at 400 for 18-20 minutes.
Anyway, the point of all that rambling is that I used the original recipe, without any allergy adaptations, but replacing the flour with whole-wheat pastry flour and the sugar with honey. I'll list the egg and dairy substitutions in parentheses for those who are interested.
Ingredients
1 C peeled and diced apples
1/2 T lemon juice
1/4 C honey (could use agave or other sweetener to make this vegan)
2 T brown sugar
1/2 C unsweetened applesauce
1/4 C melted margarine (choose dairy free brand)
3 egg whites (use 1/4 C water mixed with 3 tsp. powdered egg replacer, like Ener-G brand)
1 1/2 C whole-wheat pastry flour
2 1/2 t baking powder
1/2 t salt
3/4 t cinnamon
Directions
Toss the diced apples with lemon juice and set aside. Mix honey, brown sugar, and applesauce together. Mix egg and melted butter together, then add to the sugar/applesauce mixture. In a separate bowl, combine the flour, baking powder, salt and cinnamon. Add the dry ingredients to the wet and mix to form batter. Add the apples, then put in muffin tins, approx. 2/3 full(lined with cupcake liners, if you wish). Bake at 400 for 18-20 minutes.
Thursday, April 8, 2010
Asparagus Alfredo Pasta
I adapted this recipe from Cooking Light
Ingredients
1-box whole wheat thin spaghetti
1 lb asperagus
1/4 C butter
3 cloves garlic, minced
2 C milk
1/4 C flour
1 C parmesan cheese
salt, pepper to taste
Directions
Pre-heat oven to 425. Start water boiling for pasta. Meanwhile, trim the asparagus and cut into 1-2 inch pieces. Place asparagus pieces on a jelly-roll pan coated with cooking spray and bake for 10 minutes. Add the pasta to the water when ready, and cook according to package directions.
Heat the butter in a small saucepan over medium-high heat. When melted, add the garlic and saute for a bit. Then add the milk and flour. Stir until thickened (about 5 minutes), then remove from heat and add cheese, salt, and pepper.
When everything is done, place in a large bowl and toss together. Eat it as soon as you can.
This was a hit with the kids, who had already eaten by the time I made this dish. They both wanted to eat from my bowl when they smelled the food. My husband loved it as well.
Ingredients
1-box whole wheat thin spaghetti
1 lb asperagus
1/4 C butter
3 cloves garlic, minced
2 C milk
1/4 C flour
1 C parmesan cheese
salt, pepper to taste
Directions
Pre-heat oven to 425. Start water boiling for pasta. Meanwhile, trim the asparagus and cut into 1-2 inch pieces. Place asparagus pieces on a jelly-roll pan coated with cooking spray and bake for 10 minutes. Add the pasta to the water when ready, and cook according to package directions.
Heat the butter in a small saucepan over medium-high heat. When melted, add the garlic and saute for a bit. Then add the milk and flour. Stir until thickened (about 5 minutes), then remove from heat and add cheese, salt, and pepper.
When everything is done, place in a large bowl and toss together. Eat it as soon as you can.
This was a hit with the kids, who had already eaten by the time I made this dish. They both wanted to eat from my bowl when they smelled the food. My husband loved it as well.
Friday, April 2, 2010
Massage oil
Darryl gave me a gift certificate for a massage for my birthday, which reminded me that I wanted to post about a great, natural massage oil. Just put a little coconut oil on your fingers and rub into the skin you want to massage. It melts on contact with the skin, and smells yummy too. Also, you don't feel greasy afterwards.
Friday, March 26, 2010
Grilled Peanut Butter Sandwich

My main motivation for posting this recipe is to get the last post off the front page :) (though my moon cup arrived in the mail today. Do I dare try it out?)
This is a delicious recipe I got from Cooking Light magazine. I've adapted it a bit, but the main idea is the same.
Ingredients:
2 slices whole-wheat bread
peanut butter
jelly
sliced bananas
sliced strawberries
chocolate chips
butter or cooking spray
Directions:
Heat a non-stick pan over medium heat (I like to coat with cooking spray before heating)
meanwhile, assemble the sandwich. Spread some peanut butter on one slice of bread, some jelly (or jam, marmalade, etc) on the other slice. Layer the bananas, strawberries and chocolate chips in the middle. Grill in the pan a couple of minutes on each side. The outside should be brown and crisp like a grilled cheese sandwich, and the chocolate should be melted. Sometimes I cover the pan for a bit to get the chocolate to melt. It's divine.
Here's my super slacker version for a quick snack:
toast some bread. Spread with peanut butter, jam and nutella. Slice bananas (and strawberries, if on hand) and put in the middle. Enjoy.
This is a delicious recipe I got from Cooking Light magazine. I've adapted it a bit, but the main idea is the same.
Ingredients:
2 slices whole-wheat bread
peanut butter
jelly
sliced bananas
sliced strawberries
chocolate chips
butter or cooking spray
Directions:
Heat a non-stick pan over medium heat (I like to coat with cooking spray before heating)
meanwhile, assemble the sandwich. Spread some peanut butter on one slice of bread, some jelly (or jam, marmalade, etc) on the other slice. Layer the bananas, strawberries and chocolate chips in the middle. Grill in the pan a couple of minutes on each side. The outside should be brown and crisp like a grilled cheese sandwich, and the chocolate should be melted. Sometimes I cover the pan for a bit to get the chocolate to melt. It's divine.
Here's my super slacker version for a quick snack:
toast some bread. Spread with peanut butter, jam and nutella. Slice bananas (and strawberries, if on hand) and put in the middle. Enjoy.
Wednesday, March 24, 2010
To quell the speculation
Okay, I was going to wait until I had tried it out to blog about the alternative to tampons, but I might as well do it now. I am NOT going to make my own tampons. But it did order a moon cup. A friend first told me about something like this about ten years ago, but I was too chicken to give it a go. In retrospect, this would have been really handy to have on my mission, since I had to be really undercover about tampon use (many people felt that tampons were vulgar and that a woman was no longer a virgin after using one, but that's another story for another day). Anyway, it should get here before my next cycle, so I'll let you know. A lot of the reviews I read say there is a learning curve and that you really need to give it three months before passing judgement.
Another alternative I read about was to use actual sea sponges--you're supposed to just rinse them out and put them back in each time, but I don't think I could handle that.
Another alternative I read about was to use actual sea sponges--you're supposed to just rinse them out and put them back in each time, but I don't think I could handle that.
Tuesday, March 23, 2010
Anti-Antiperspirant
I finally took the plunge. My friend Shelly had great success with this recipe, so I decided to give it a go. She made me some while I watched. I put it in my old antiperspirant container for easy application (I washed it first). Result: it works better than the store bought stuff I used to use. I actually sweat less now (though this still might be more than many of you are used to). And I'll be glad to be rid of the stains on the underarms of all my clothes.
I've been gradually weeding out toxins in my life, and decided that I should do something about the two biggest offenders: antiperspirant and tampons (more on this later).
I've been gradually weeding out toxins in my life, and decided that I should do something about the two biggest offenders: antiperspirant and tampons (more on this later).
Subscribe to:
Posts (Atom)

 Posts
Posts

